The Basics: Getting Started with Pinegrow and HTML
Learn the basics of Pinegrow, HTML and CSS by building a small example page. We will create a new project, drag HTML objects to the page and then design it with CSS. This will give you a better understanding of how Pinegrow works.
1.
Create project
Open Pinegrow and launch your first website
2.
Build website
Build the basic structure of your website with HTML elements
3.
Design objects
Make your website look good: Style the elements you used with CSS
1. Create a project in Pinegrow
Step 1: Open Pinegrow and create new project
If you bought our Pinegrow Starter project, you can save yourself the following steps and start with a project where everything is already prepared for your website.
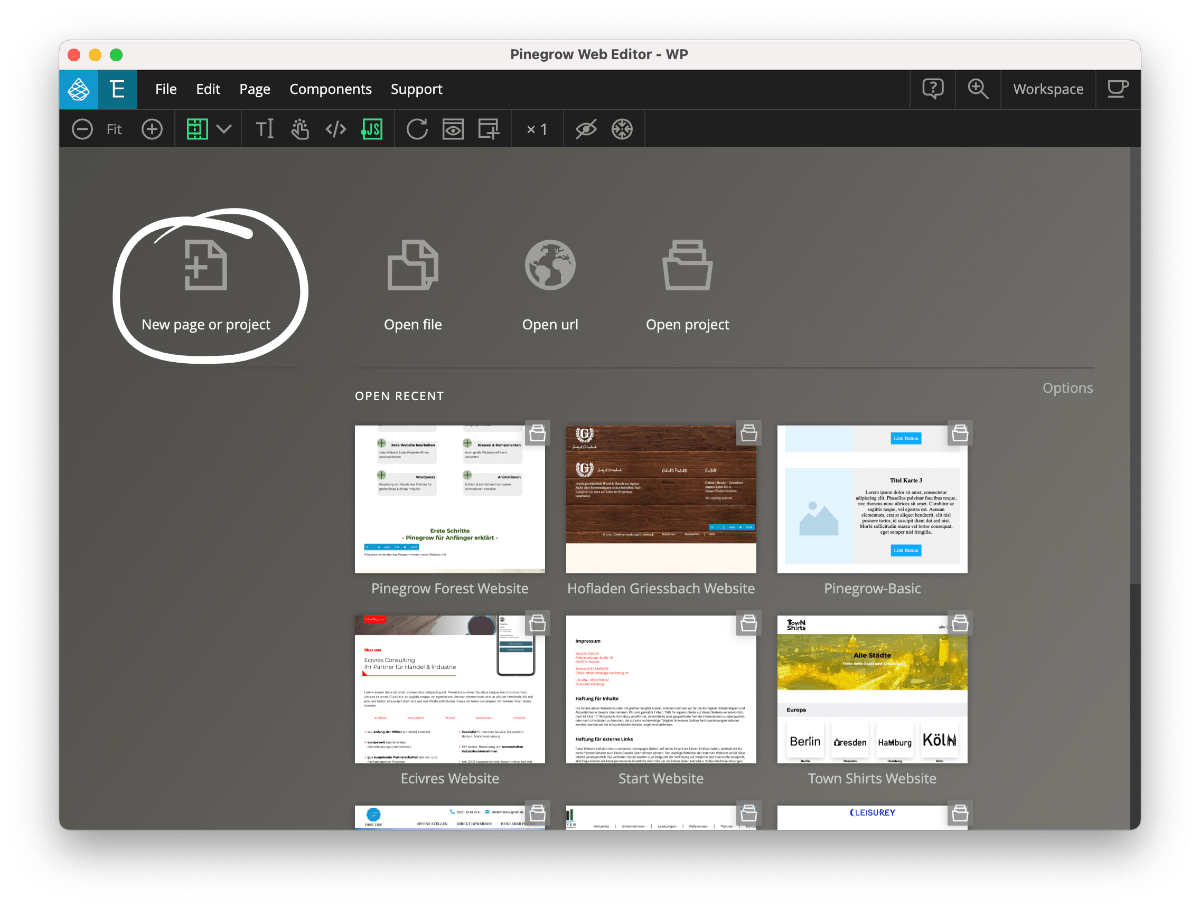
Click on "New page or project" to start a new Pinegrow project
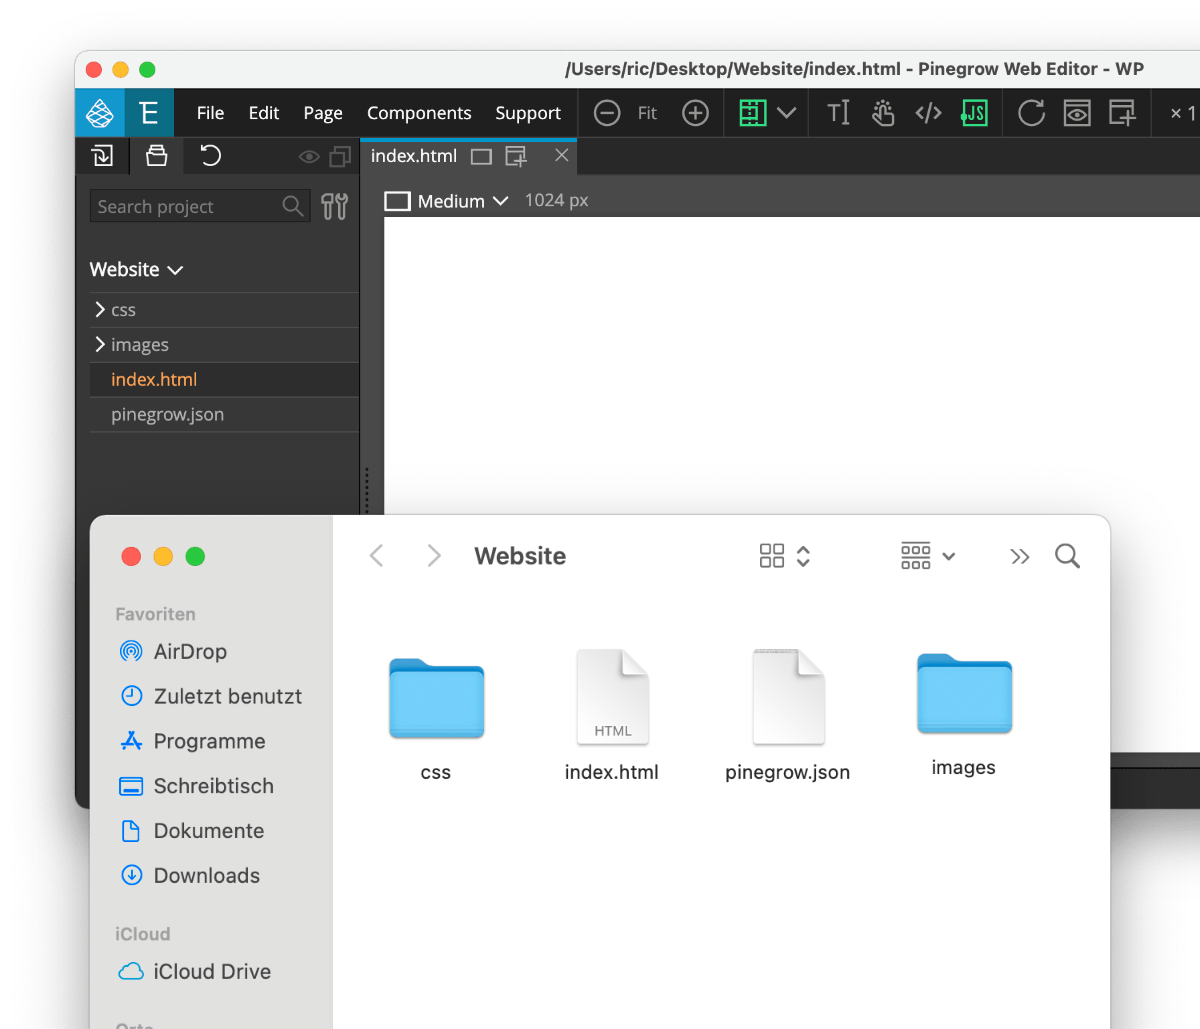
Your website is in its own folder
Step 2: Open a website in Pinegrow
Now you choose on which basis (Bootstrap, Foundation, ...) you want to build your website. Just choose Plain HTML, you can also add a framework later.
Now save your new project somewhere. Click on File > Save as... and save the index.html (your start page) to a folder (a folder specifically for your website).
Pinegrow automatically creates the folder CSS (where your style files are located) and pinegrow.json (where settings for Pinegrow are stored). Create a folder for your images in your website folder (e.g. "media", "images" or similar). Here you can already drag in some images.
If you want to bypass these rather complicated steps, just start with our Pinegrow Starter project, where everything is already prepared for an easy start.
2. Build a website from HTML elements
Each website consists of blocks
To show you how to work with HTML and Pinegrow, we'll just recreate this simple website. It consists of three sections: a title image, a block with text and a block with text and image.
These blocks (section or div block) contain the elements of the website. In the top block there is a background image and a heading, in the middle block there is another heading and a text box, and in the bottom block there is a text box and an image.

scroll
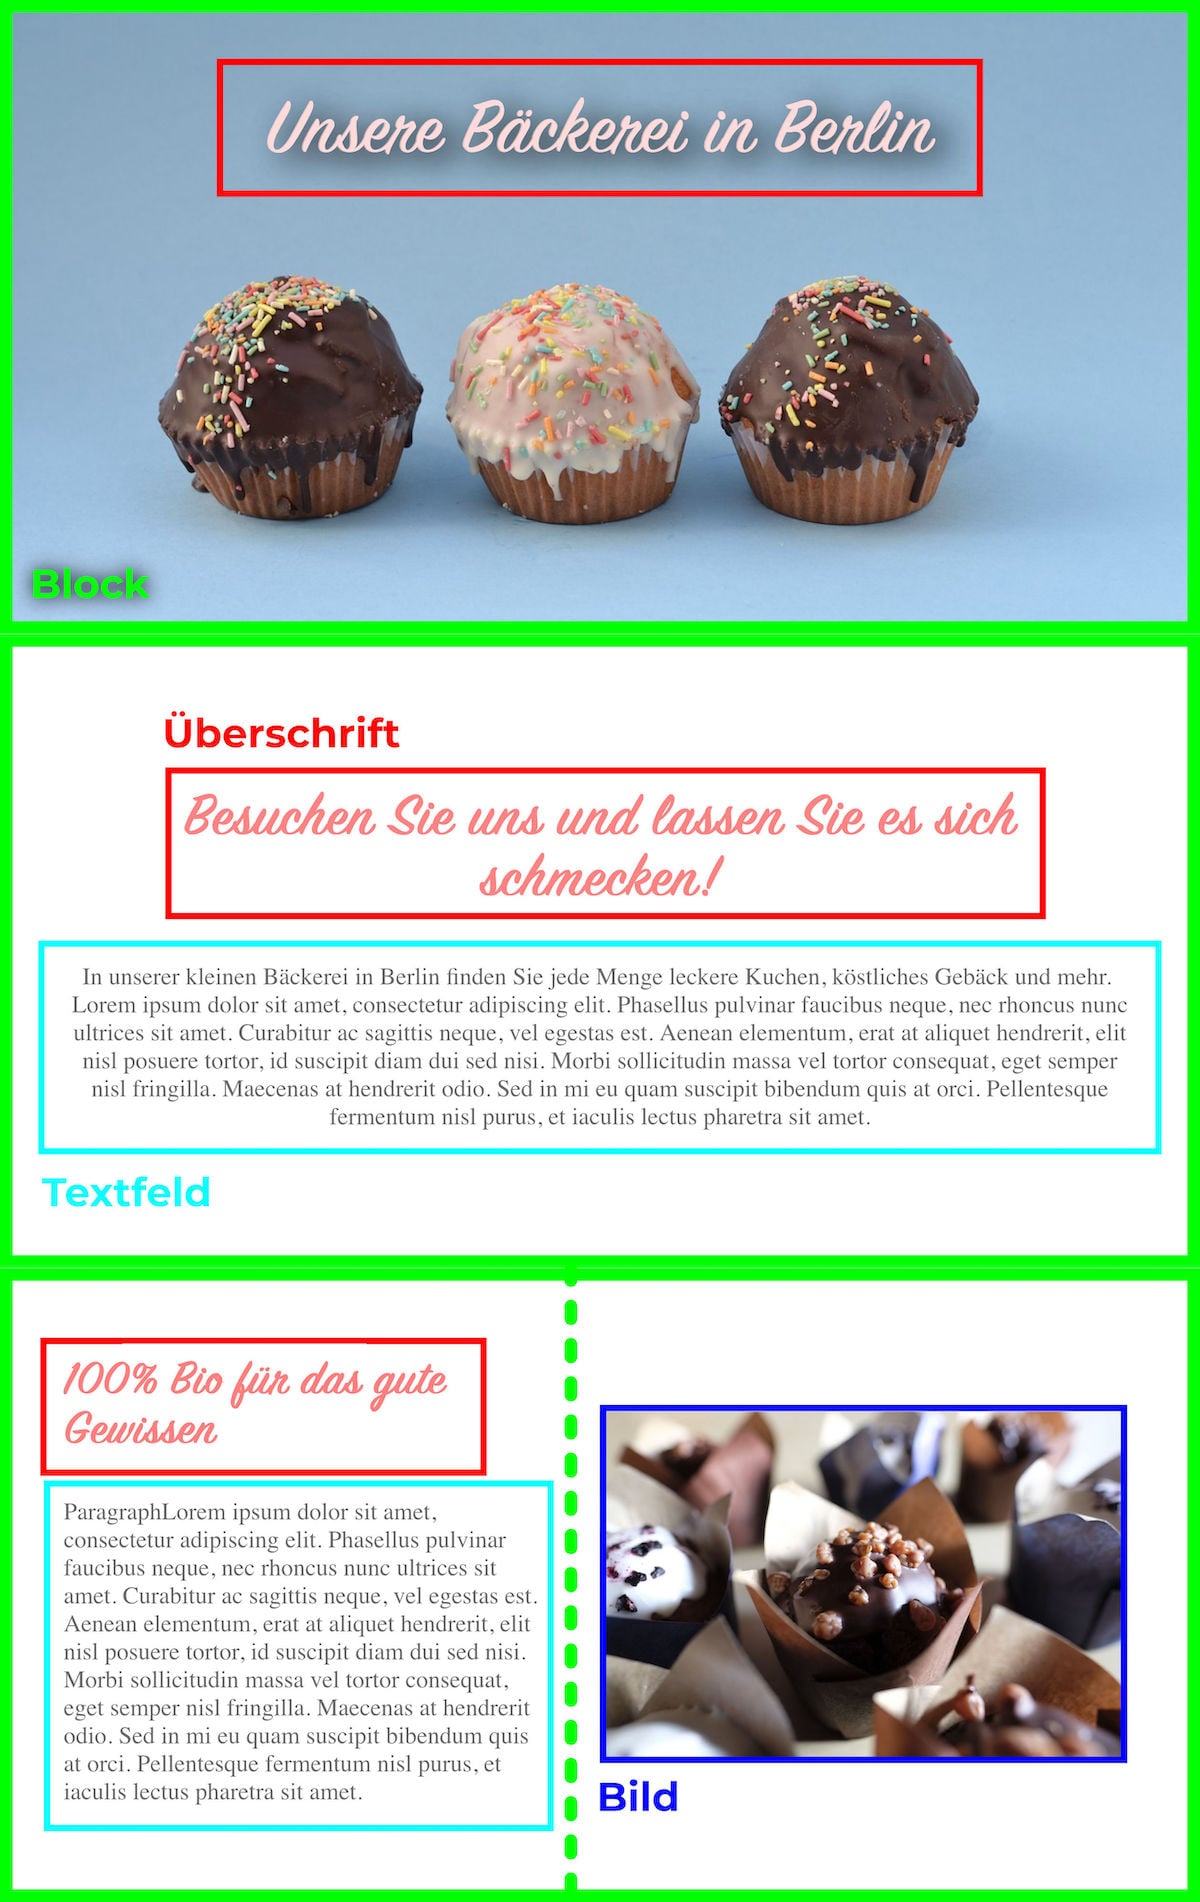

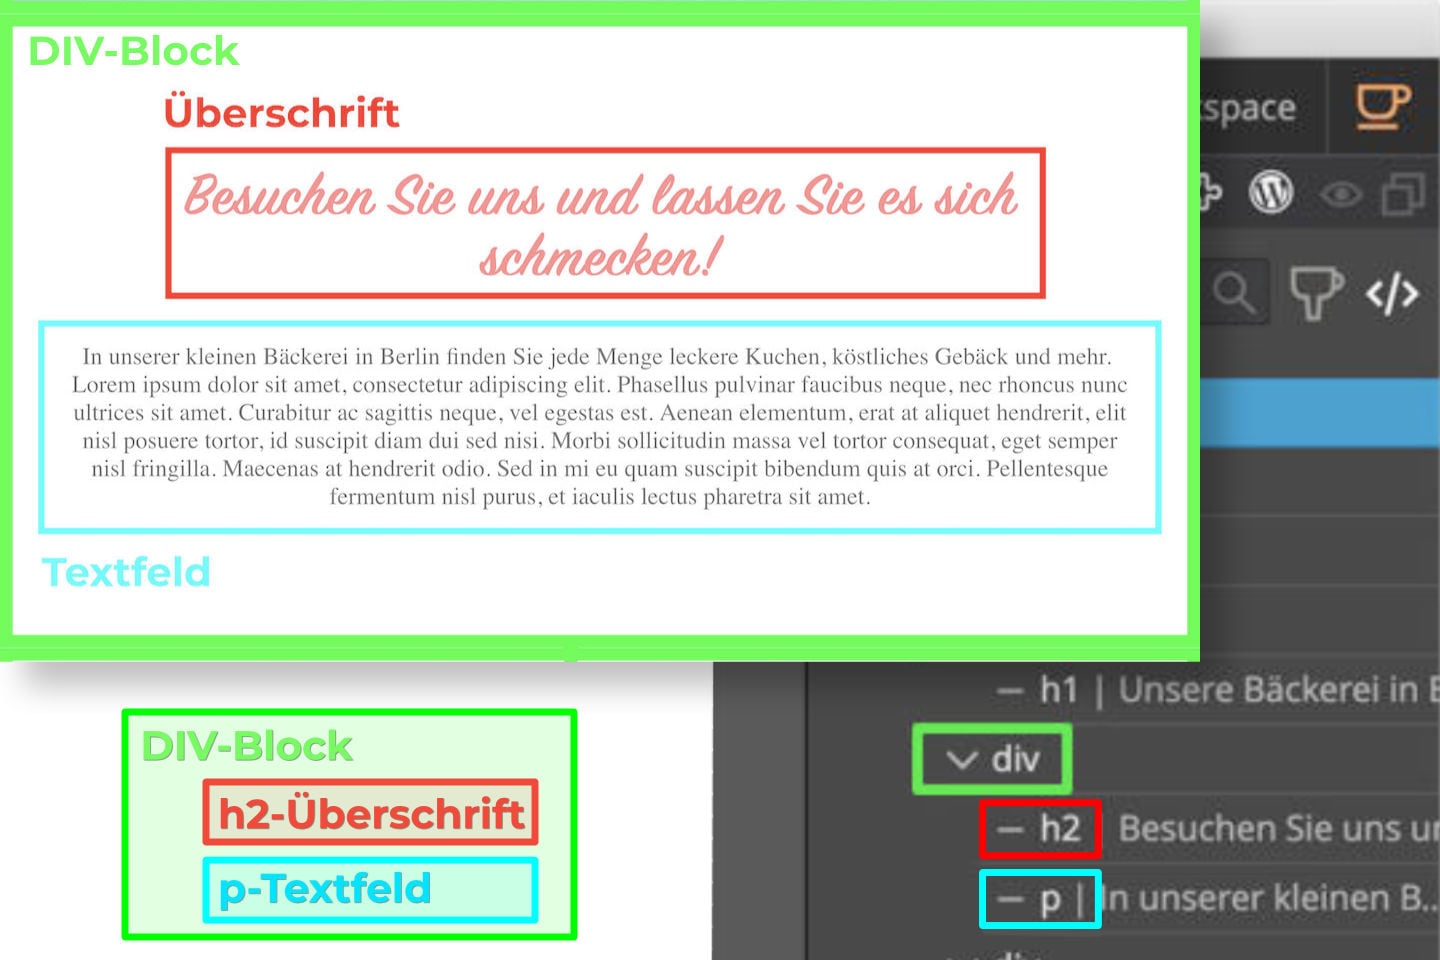
Divide your website into div blocks, headings, text, images, etc.
Step 1: Plan the structure of the page
It's best to have a clear idea of what you want the end result to look like before you start building the website. You can also implement your ideas in a graphics program beforehand and fine-tune the design of your site.
Once you know what you want to build, you can figure out how to do it. Very important are the div-blocks, in which you can put elements like text or images. It's best to put all elements that visually belong together in one div block. That way you can move and design them together later.
If you have purchased our Pinegrow Starter Project or a design, you will find lots of pre-made blocks that will make it easier for you to build your website.
Step 2: Drag three div blocks to the website
We want to build the start page, so click on index.html (your start page) in the Project tab. You will see an empty page, which we now want to fill with HTML elements. You can find them in the Library tab on the left side.
In the Library tab are all HTML elements like div (block), h1 (heading), p (text field), image and more. First we want to build the three main blocks / areas: To do this, simply drag and drop three div elements onto the empty website in the middle.
Simply drag div blocks onto the website
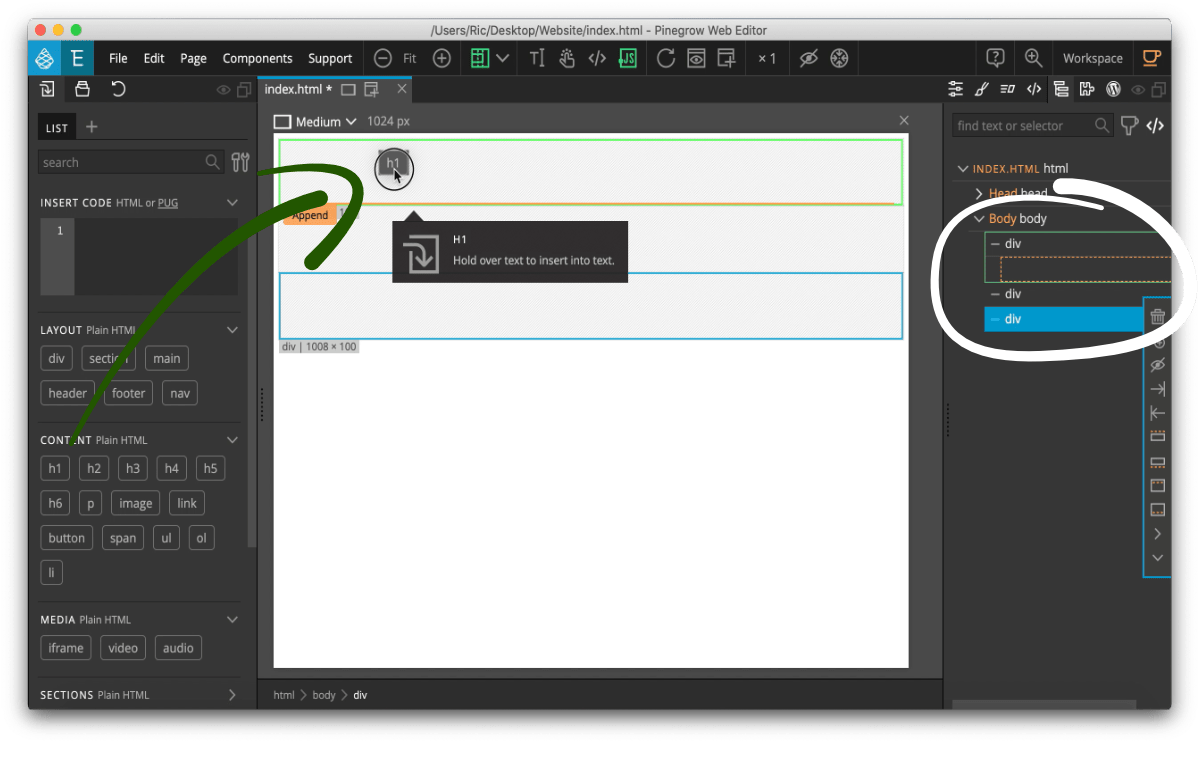
Easily drag headings to the areas of your website
Step 3: Drag headings to the website
You can also see our three div blocks (areas) by clicking on the Tree tab in the right sidebar. This view gives you a good overview of all the elements on your website and which div blocks they are in.
Now we fill our three div blocks with content. In the upper area we only want a headline and a background image. We will add the background image later, for the headline we have to take care that there are different levels (h1, h2, h3, h4, h5 and h6). H1 is the main heading while h6 is the least important heading. For our top section we want to use an h1 heading: Drag the element h1 from the library into the top div block. You can double-click the text and type in your own heading. We are already done with the construction of the first area.
Step 4: Drag texts and images to the website
The middle area should consist of a heading (this time we'll use h2) and a text field. Text boxes are called p in Pinegrow (and html). Just drag an h2 and p element from the library into our middle div block. You can also use the Tree tab in the right sidebar to make it easier to move the elements into the div blocks.
The lower area should consist of a text field on the left and an image on the right. So that the elements are displayed side by side later, we pack the text (with h3 heading and text field p) and the image into two separate div blocks.
So we drag two more div blocks into our lowest div area. Again, the tree view helps here. In the upper div-block we put a h3 headline and a p textblock. In the lower div block you drag an image element. Now we are done with the basic HTML structure of our website. Don't worry, the strange appearance won't stay like this: Only with the styling the page will look good.
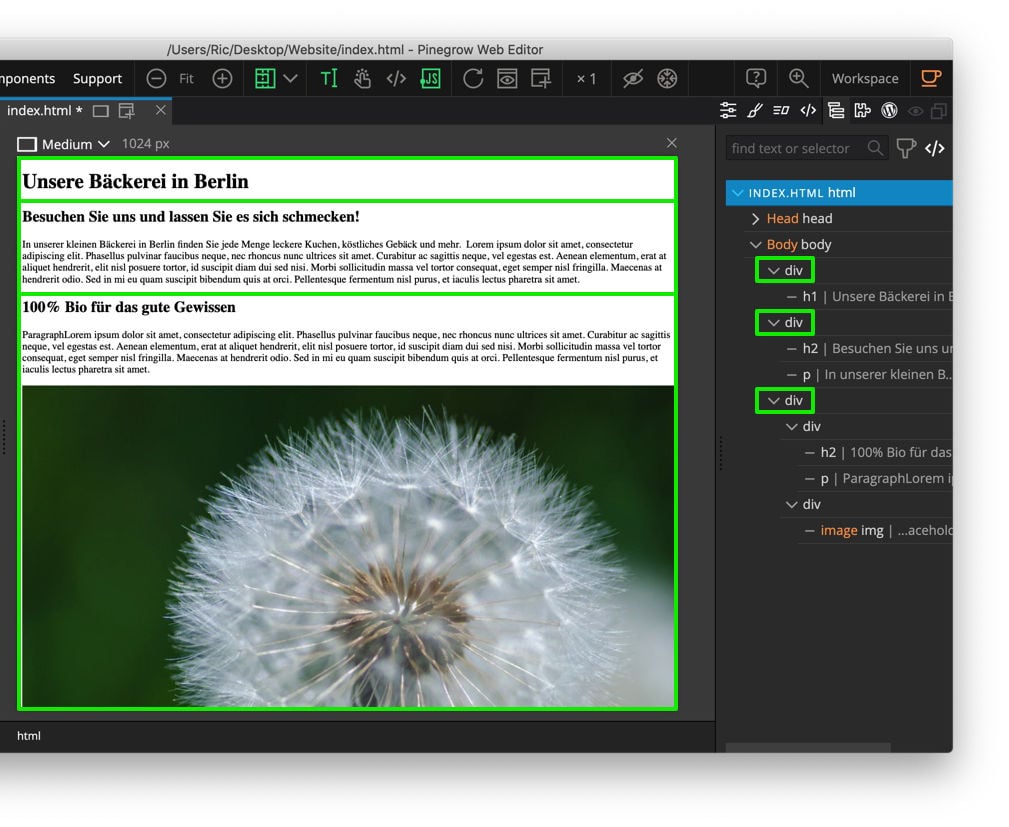
Tip: Save time with our Pinegrow Starter project and drag already prepared blocks to your website
3. Style a website with CSS
Step 1: Drag images to website project
Currently, our website already has all the elements, but it still looks pretty ugly. We will change that with the styling.
First we need to upload the images we want to have on the website to the homepage. To do this, simply open the website folder and drag your images into the images folder (you can also name it media, pictures, or something else).
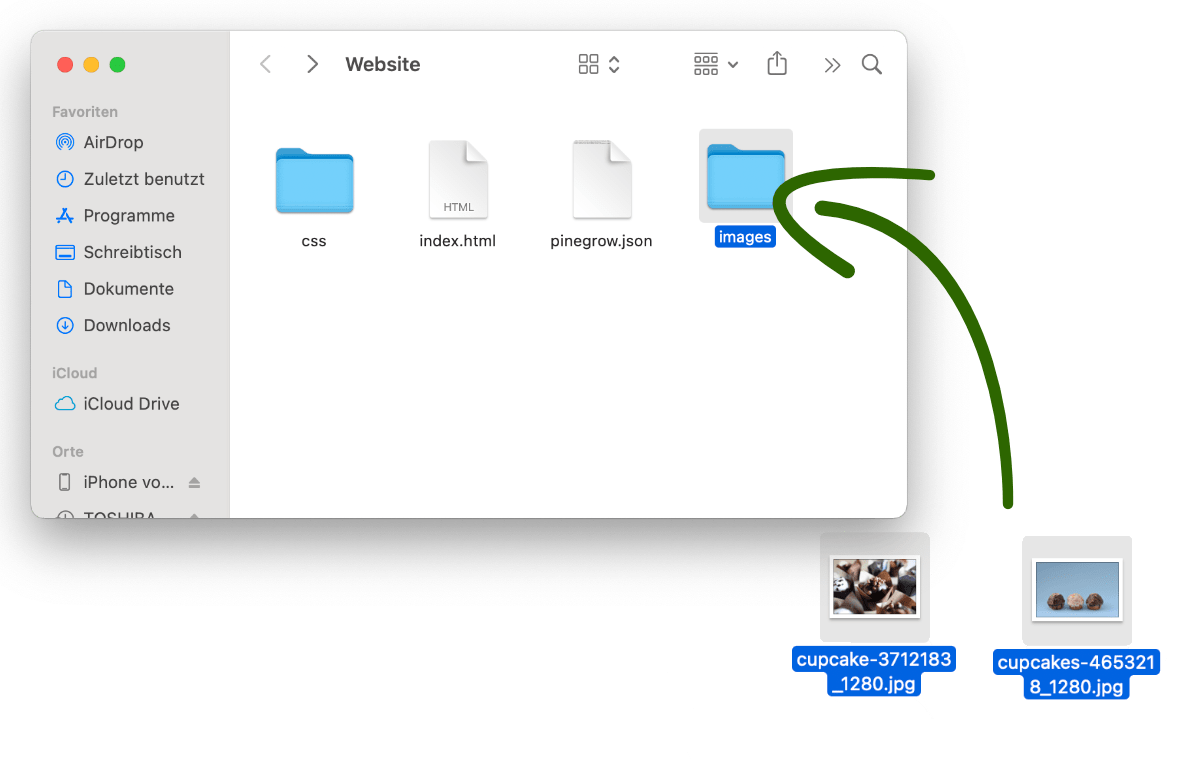
Drag images to the images folder of your website folder
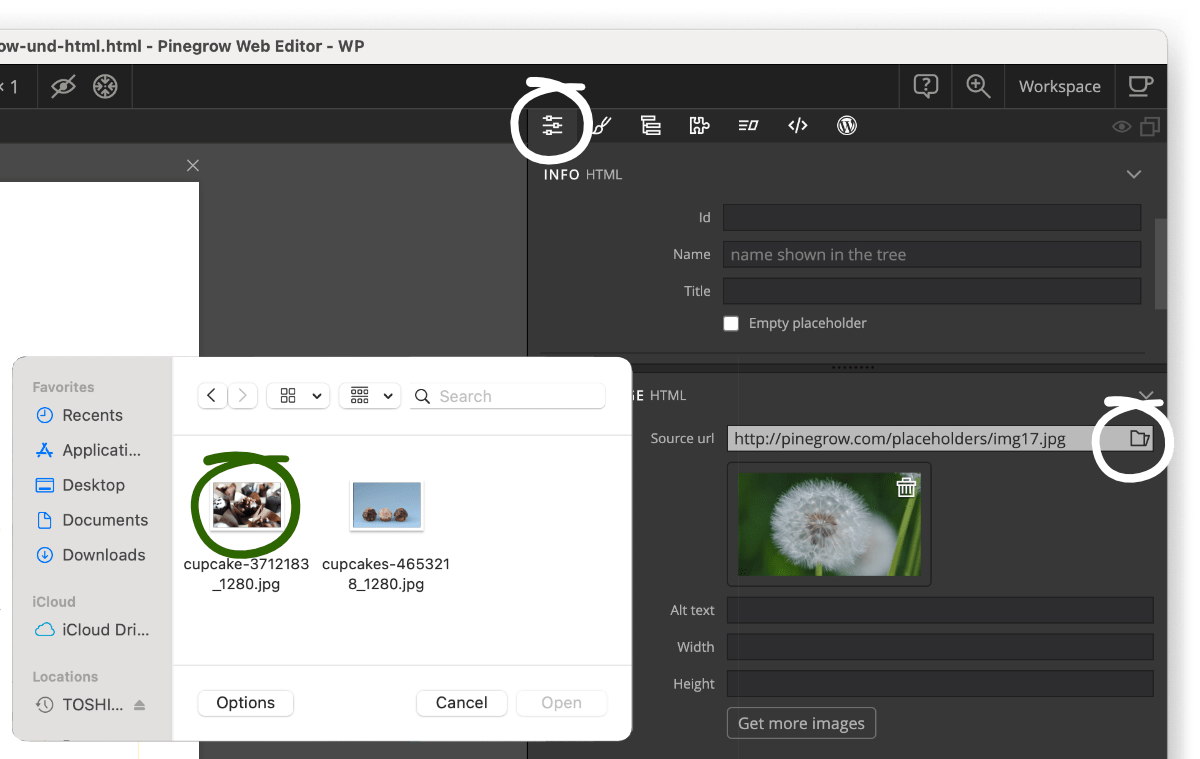
Select your own images in the Element properties tab
Step 2: Select your own images
To see your images on the website, you need to select them in Pinegrow. Click on your image (directly on the center website preview or the image object in the Tree tab of the right sidebar) and then go to the Element properties tab.
Here you can select your image from the website folder. In the Alt text field you can add a short image description if you want.
Step 3: Select object and open Style Tab
Now let's start designing our three main areas. To do this, first select the top div block, which will get a background image and contain a heading.
Click on it in the middle preview or in the tree tab in the right sidebar and then switch to the style tab. Here you will find various settings for the appearance of the element such as dimensions, spacing, fonts, shadows, display options and more.
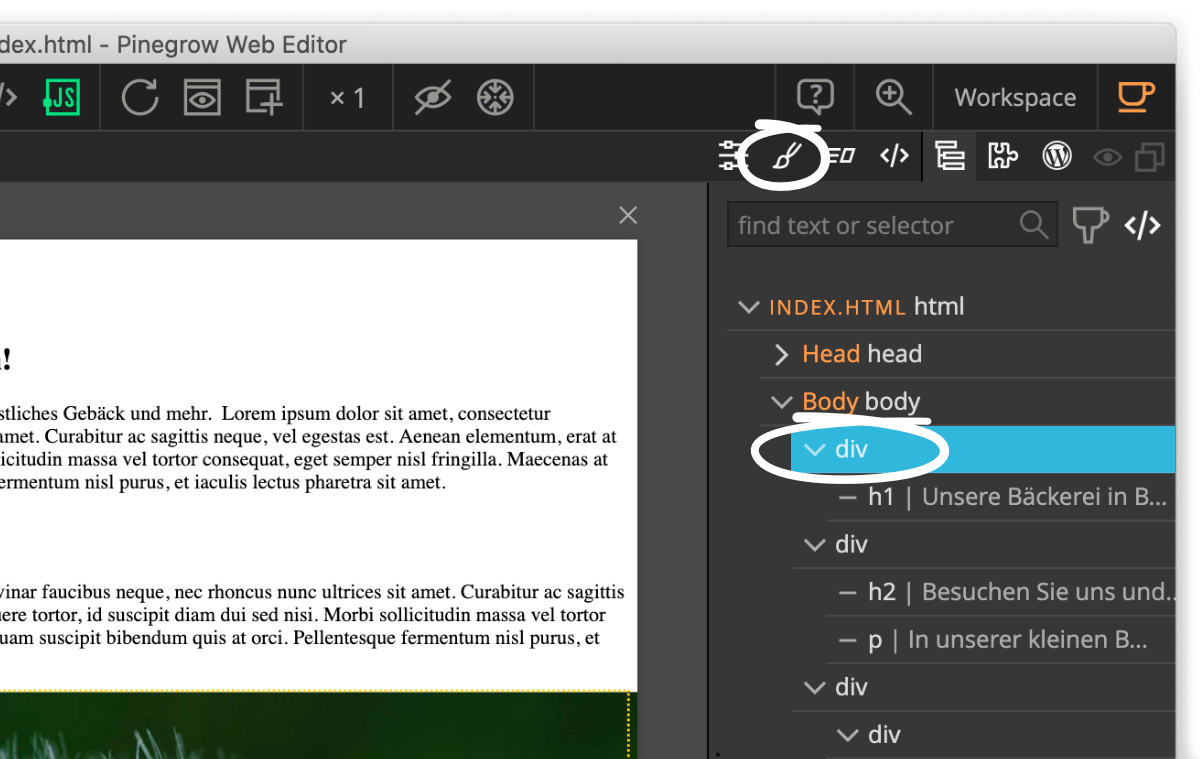
Select an object (e.g. Div-Block) and go to the Style Tab to style it
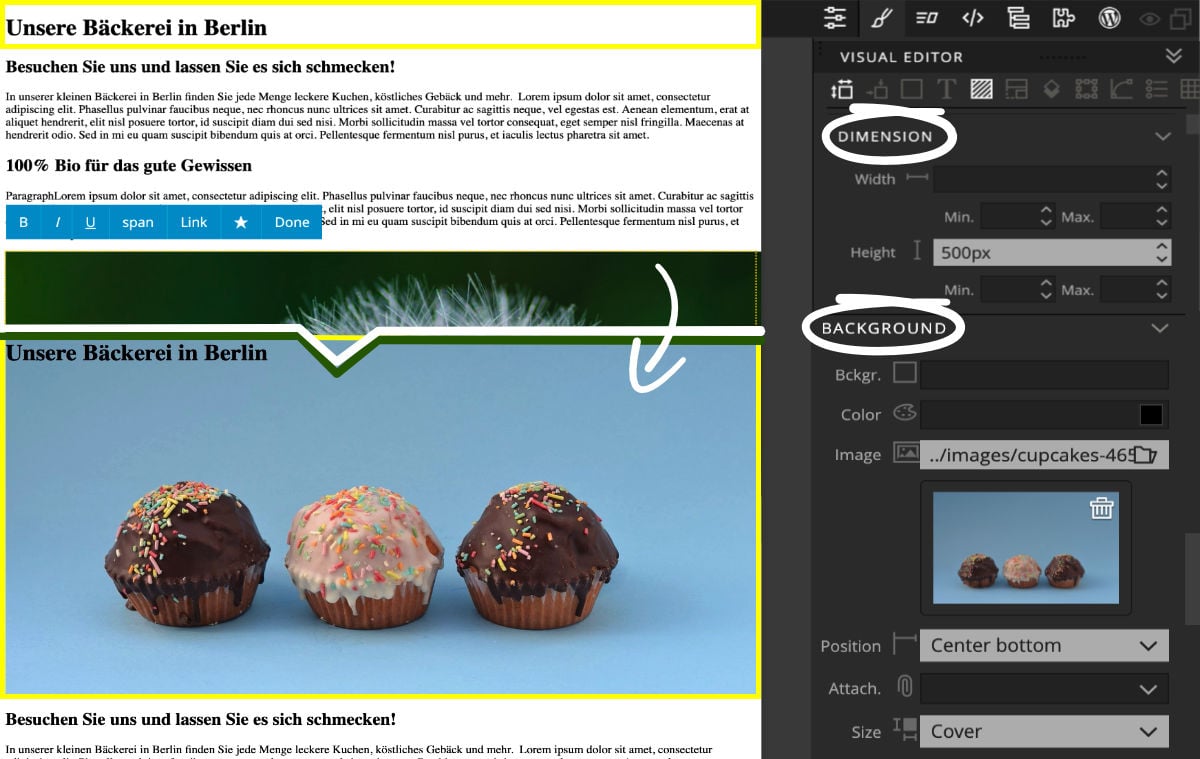
Title areas can be given a height and title image in the style tab
Step 4: Design div blocks (areas)
Under Dimension you can give the block a height (e.g. 500px), so we already have space for our title image. Under Background you select the background image (in the images folder of the website).
You can position the cover image using different settings (e.g. Position: Center bottom and Size: Cover(to fill the area with the image)).
Step 5: Spacing and classes
It makes sense to assign a class to each object we style. We do this easily in the Style Panel. Classes always start with a dot and can be applied to multiple objects. We'll call our first div block ".titleimage".
Now we can design the second area. This contains only a heading and a text. We want to position the text in the center and leave some space to all sides.
Spacing is an extremely important value because it makes the content look airier without having to set fixed heights everywhere. So the content always looks good, no matter how wide the browser window is or how many elements an area contains.
So at Margin & Padding we select the spacing (preferably the inner spacing) and choose e.g. top 80px, bottom 100px and left & right 50px. Under Font / Text you can center the text.
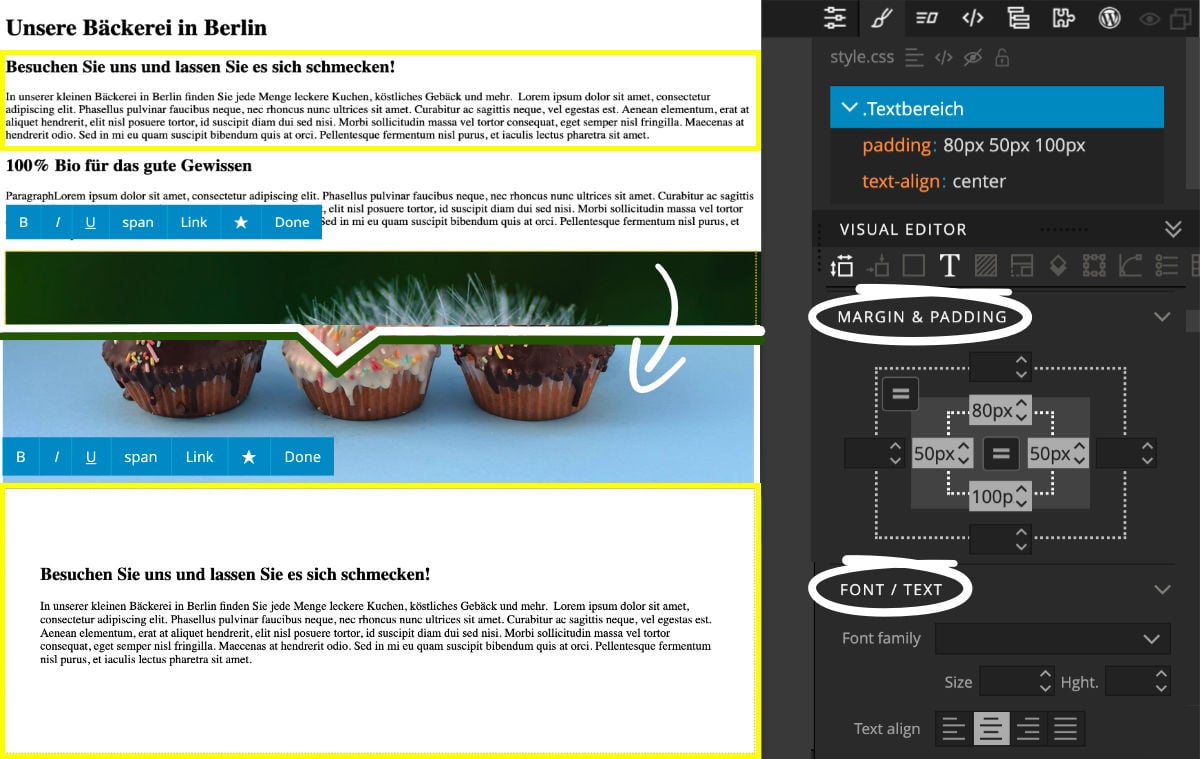
Use spacing (margin & padding) to make your website more airy
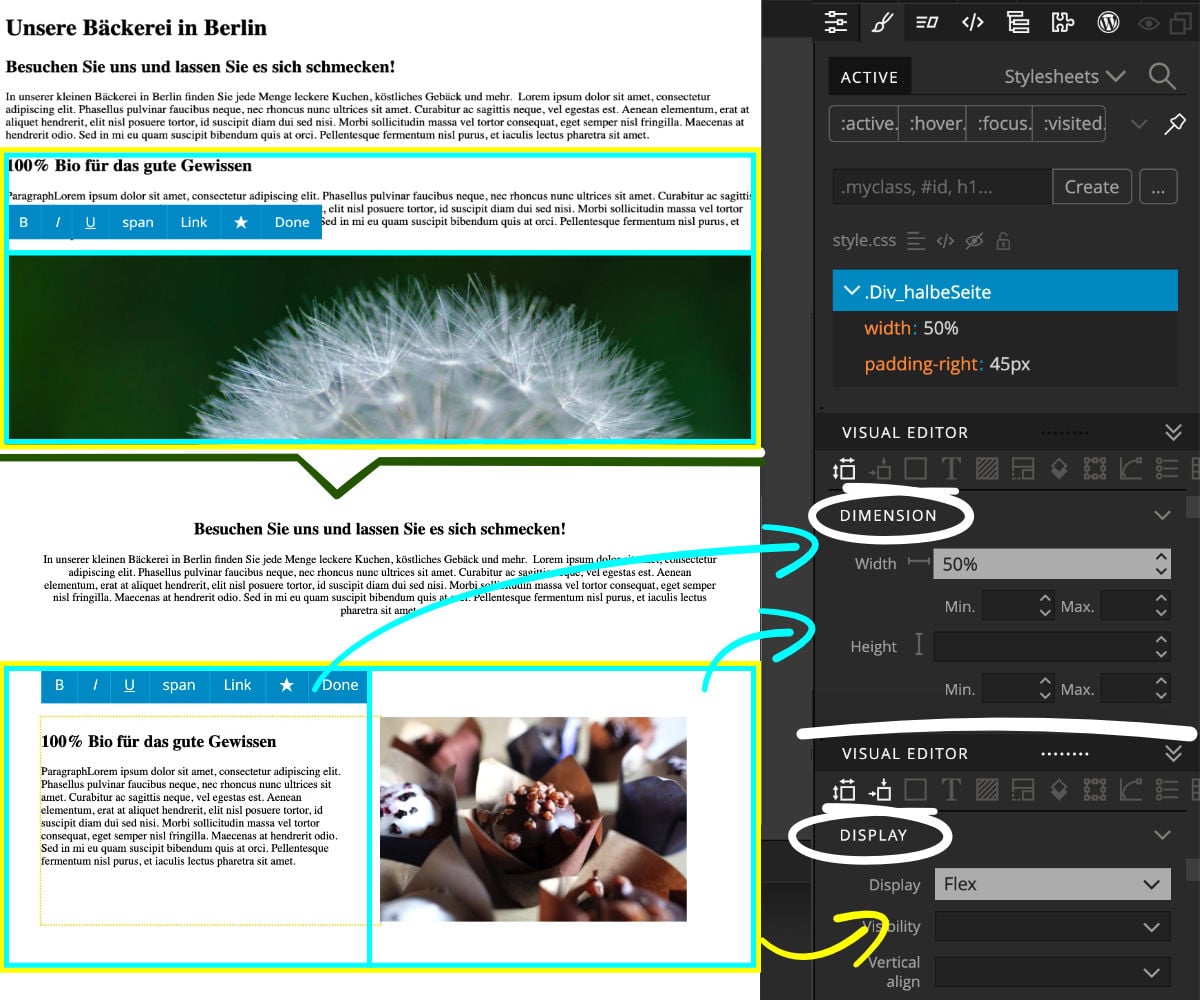
With the Display: Flex setting you can display areas (div blocks) side by side
Step 6: Arrange areas next to each other (flex)
In the next area, we face a problem: we want to arrange text and image side by side. Actually, objects in HTML always appear below each other.
We click on one of the two div blocks within the lower area and specify "50%" instead of a fixed pixel width for the Width attribute under Dimension this time. This way the block always takes up exactly half of the page. We do the same for the second div block that contains the image.
Now both blocks are narrower, but still below each other. Also, the image is still too big because we haven't assigned a size to it yet. So we click on the image and give it a width of 100% (under Dimension in the Style panel). This way it fills the bottom div block perfectly (i.e. half the page).
To display our two blocks side by side, we select the parent Div block (i.e., our lowest of the three areas) and choose Flex under Display. This way, instead of normally displaying objects below each other, they will be displayed side by side if possible.
Step 7: Select font and font color
Now our page already looks quite good, but the font is still boring. Select any text element (h1, h2 or p) and set the font, size, color and more under Font / Text. You can choose Google Fonts or just type your font in the box. How to get your own fonts on the website will be explained later.
So that you don't have to set the font in each text field individually, you can also set a CSS rule for all text fields (e.g. the text element p): Click on the button with the three dots in the rule area and select the p element. Click on Create and you can determine how all p elements on your website should look like.
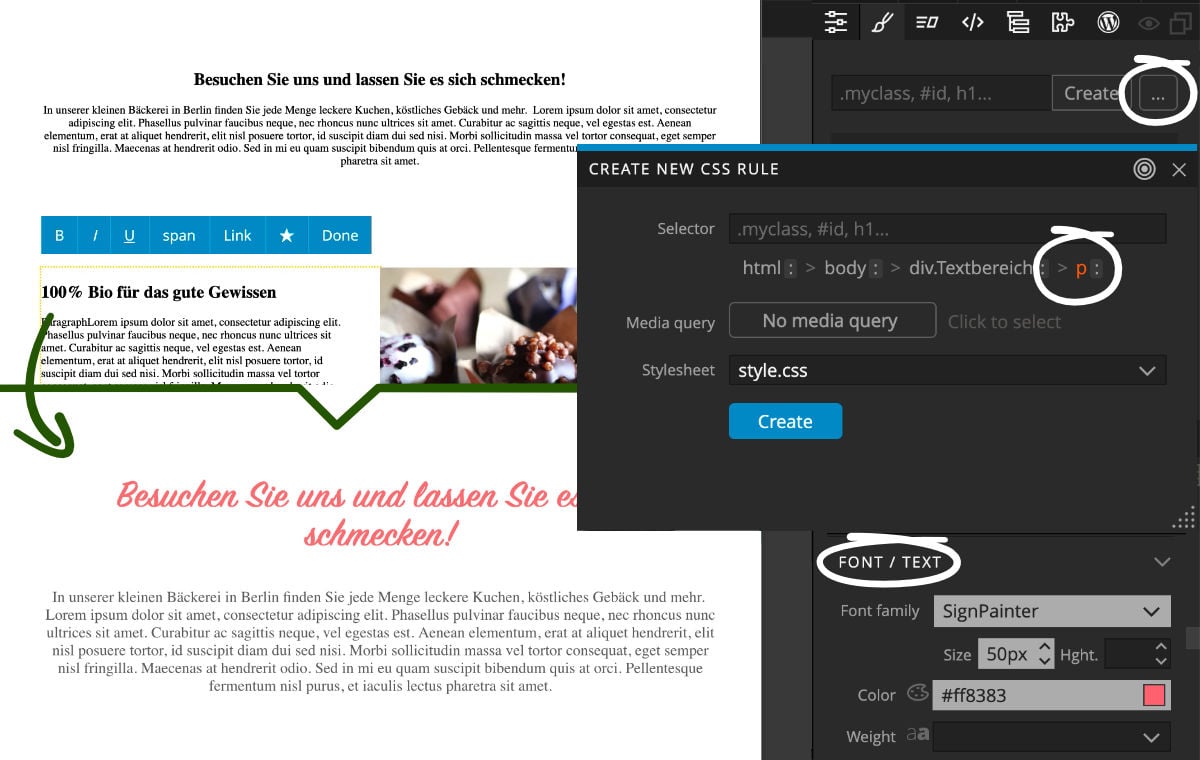
Choose the same font, color and size for all texts on your website
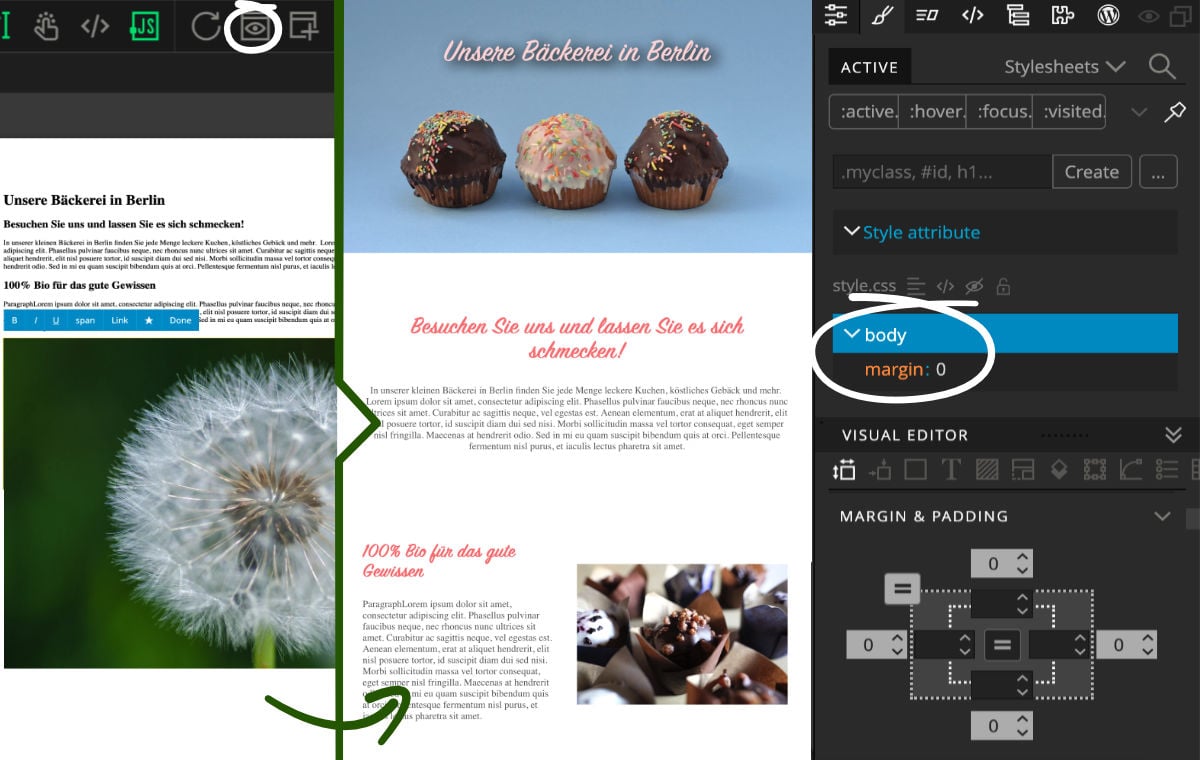
The white border around your website is already removed in our starter project
Step 8: Remove body frame and view website in browser
Now your first website looks good! You can get rid of the white frame by clicking on the body element in the tree panel and then setting the spacing in the style panel under Margin & Padding to 0 everywhere. You can save these and many other settings if you use our starter project.
Clicking the Preview page in browser button in the top toolbar you can view your website in a browser like Safari, Chrome or Firefox.
More instructions on how to further edit and publish your website and more info on the individual objects such as texts and images can be found here on Pinegrow-Forest.
